Disable Automatic Updates In WINDOWS 10
There’s actually an option that will let you choose how updates are installed on your own schedule, but it’s buried in Group Policy. Only Professional, Enterprise, and Education editions of Windows 10 have access to the Group Policy editor. To access the group policy editor, press Windows Key + R, type the following line into the Run dialog, and press Enter:


gpedit.msc
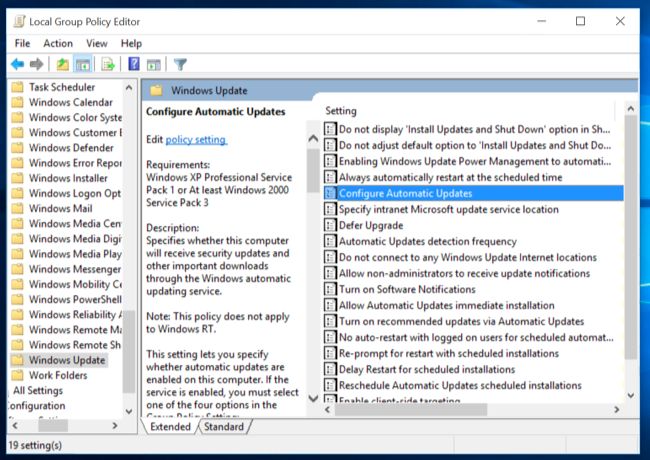
Navigate to Computer Configuration\Administrative Templates\Windows Components\Windows Update.
Locate the “Configure Automatic Updates” setting in the right pane and double-click it. Set it to “Enabled,” and then select your preferred setting. For example, you can choose “Auto download and notify for install” or “Notify for download and notify for install.” Save the change.
Visit the Windows Update pane, click “Check for updates,” and then select “Advanced options.” You should see your new setting enforced here. You’ll also see a note saying “Some settings are managed by your organization,” informing you that these options can only be changed in Group Policy.
To disable this later, go back to the Group Policy editor, double-click the “Configure Automatic Updates” setting, and then change it from “Enabled” to “Not configured.” Save your changes, visit the Windows Update pane again, click “Check for updates,” and then select “Advanced options.” You’ll see everything change back to the default setting. (Windows Update only seems to notice the setting change after you click “Check for updates.”)


I found kms activator windows 10 very relaxing
ReplyDelete