Posts

Showing posts with the label Blog

CSS Gradient Buttons for Blog

Image
R ecently I talked about CSS cross-browser gradients and last week I wrote again about CSS3 gradients. So what I’m going to do today? I will show you how to put the CSS gradient feature in practical use. In this article you will see how you can create a set of gradient buttons just with CSS (no images). 1. Adding The CSS Step 1.  Go to  Blogger Dashboard  > Template > click on the Edit HTML button: Step 2.  Click anywhere inside the code area and press the CTRL + F keys to open the Blogger search box. Once you have added the Contact form widget go to Blog Title → Template → Edit HTML.  Now add the below given CSS code just above   ]]></b:skin> . /*----------------------------*/                .button        {            margin: 10px;            text-decoration: none; ...
Metro Style Search Bar for Blogger

Image
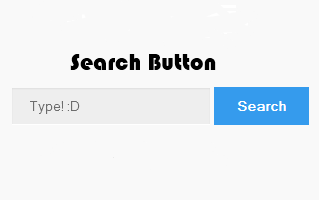
A s Microsoft has enrolled the new Windows 8 Metro Style OS, a lot of change in the designing section of the blogging community has been seen. Now a days people are changing their template/theme and giving them a Metro look. If you are one of those people here is a fabulous widget for you - A Metro Style Blogger Search Bar. Its CSS has been compressed to make it load faster. The bar looks very cool and I personally like it. Well there is no need to demo for this search bar, you can see how this search bar looks in the above image. If you think that you need to make some changes in the code or the above button is not working for you then you may use this method. STEP #1:  Login to your blogger account, select your blog and go to Layout. STEP #2:  Add new widget by clicking on the Add a gadget link and select Html/JavaScript from the popup window. STEP #3:  After adding the HTML/JavaScript you need to copy the following script and paste it in the Content box. ...

CUSTOMIZE BLOGGER LABELS WITH CSS

Image
T oday I will teach you how to customize blogger labels using Css.I am sure that no other tutorial make this type of awesome good looking hover effect Labels right now.It will change your simple blogger labels into good looking white buttons and also add hover effect by which whenever any blogger click on it hover effect will appear. Follow Below steps to add this awesome labels to your blog- Step 1 Go To Blogger Dashboard. Click On Layout Tab. Now Click On Add gadget. Add Labels Gadget. Unchecked Show Number Of Post Per Label Ans Save It. Unchecked Show Number Of Post Per Label Step 2 . Adding The CSS Step 1.   Go to  Blogger Dashboard  > Template > click on the Edit HTML button: Step 2.  Click anywhere inside the code area and press the CTRL + F keys to open the Blogger search box. Once you have added the Contact form widget go to Blog Title → Template → Edit HTML.  Now add the below given CSS code just above     ]]...

Customize Blogger Contact Form

Image
S o most of you are aware of the recent gadget added to blogger widget directory and that is a small contact form with two input fields for name and Email and a text area for writing the message. We use a complex PHP Form for our contact page but blogger has made it extremely easy for you guys. Ever wondered how to customize this simple form into a professional looking contact form that may give a complete new boost to your overall blog look? Fortunately  readers will be the first to learn this trick today. Plus you will also learn how to add this form anywhere on your blog! I had sometime today so I designed a custom version of this contact form by adding several new CSS3 effects and also added an additional button called "Clear" that will reset and erase the message for your visitors if incase they wish to rewrite a new message Note: We have added the contact Form to a static page and also the sidebar. Just to show that you can add this Custom Form anywhere you want. O...

Stylish & Cute Subscription Form Widget For Blog/Website

Image
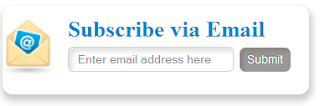
M ost of peoples want simple, clean yet Stylish and Cute Subscription Form for their blogs. Today we came with Stylish and Cute Subscription Form Widget for Blogspot Blogs and Wordpress. This widget will keep your sidebar neat and clean and will surely attract visitors to Subscribe for your daily updates via Email. This widget has some CSS effects and is easy to customize. Follow following steps to add this Stylish and Cute Subscription Form Widget to Blogspot and Wordpress. STEP #1:  Login to your blogger account, select your blog and go to Layout. STEP #2:  Add new widget by clicking on the Add a gadget link and select Html/JavaScript from the popup window. STEP #3:  After adding the HTML/JavaScript you need to copy the following script and paste it in the Content box. <style> .abt-email{ background:url(https://blogger.googleusercontent.com/img/b/R29vZ2xl/AVvXsEglLGK68zKSNuL15YfPN-75u2KEskwAvVUJz2G7Fpac_8h49sZ3Ff9oFfdzm0Dogce9HhseBoe...

Awesome Contact Form Widget for Blogger

Image
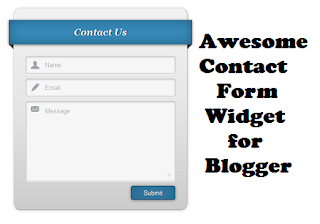
Today I am going to show you how you can add a really awesome and cool looking Contact form in a page of your blogger blog. This contact form looks really elegant and is very eye-catching. This contact form inspired from Bloggertut works on CSS and has a very rich feel in it.  You can make your Contact page more awesome by adding this widget to one of your blog's pages. A live working demo of this widget can be seen by clicking the below button. After seeing the demo if you wish to add this contact form in your blog then follow the steps below. 1. Adding The CSS Step 1. Go to Blogger Dashboard > Template > click on the Edit HTML button: Step 2. Click anywhere inside the code area and press the CTRL + F keys to open the Blogger search box. Once you have added the Contact form widget go to Blog Title → Template → Edit HTML.  Now add the below given CSS code just above ]]></b:skin> . #contact_wrap h3:after { content: ' '; ...

Advanced Random posts widget for Blogger with image thumbnails and snippets

Image
When your blog has too many posts, visitors don't always have the time or desire to go through all the posts written there in order to make an idea of the blog's content. Thus, a random posts widget that will allow visitors to find content more easily could be really useful. This tutorial will show you how to add a random posts widget to display a list of posts in a random order with thumbnails and excerpts. Adding Random Posts with Thumbnails and Posts Summary on Blogger Step 1. Login to your blogger account, select your blog and go to Layout. Step 2. Add new widget by clicking on the Add a gadget link and select Html/JavaScript from the popup window. Step 3. After adding the HTML/JavaScript you need to copy the following script and paste it in the Content box. <style> #random-posts img {     border-radius: 10px;     float: left;     margin-right: 5px;     width: 75px;     height: 75px;   ...